Getting Started with AWS
The Amazon Web Services world is an entire beast on its own, and I believe some knowledge around it should be useful to all tech related roles, from programmers to DevOps and system administrators. I am recently trying to explore AWS, so I will try to document my process along the way.
In this post I have gathered the steps for signing-up with AWS and the first configurations to make to your account before even starting an instance or a service. It is best to follow the official AWS documentation for each step (as it will be always up to date), but the main actions to do should remain pretty much the same.
After this process you should be ready to spin some instances using the free tier that come with every new AWS account for a year. The free tier is not applicable to any instance or service, and have limited quotas, but should be enough for anyone trying to learn and explore the platform. See all available Free Tier Products to see what you can deploy.
Create an AWS account
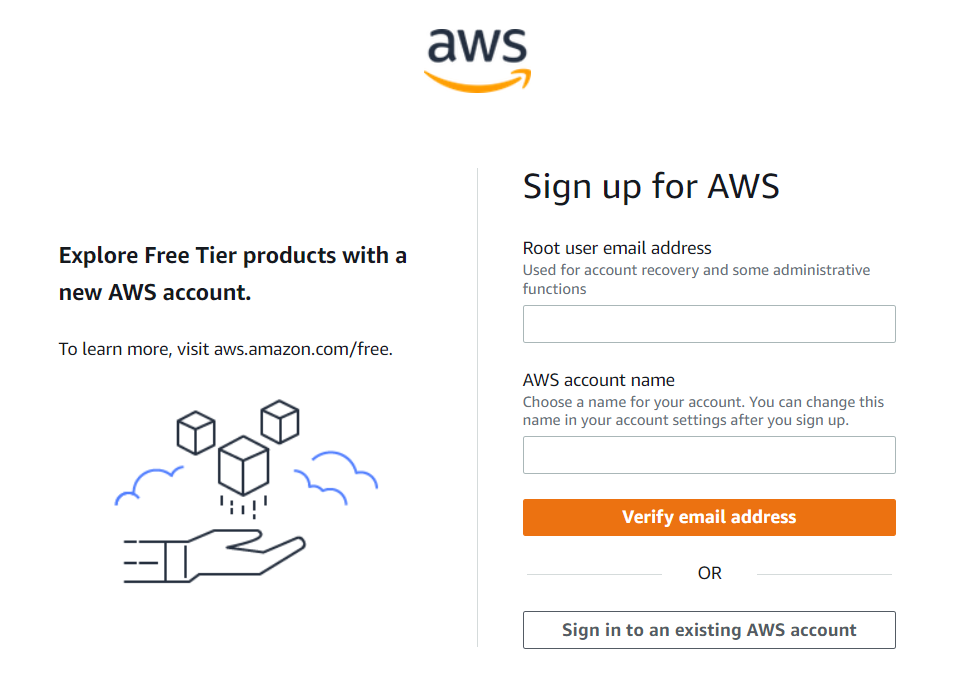
The first thing to get started with AWS, is to create a free AWS account. Navigate to the main AWS page and click on the Create an AWS account button:
This process will set up your Root account:
- Add an email and an account name for your Root account.
- Click Verify email address to get a verification code in the email to add.
- On the next screen, create a password for your Root account.
- Add your personal and contact information.
- Add your desired billing information.
- Add and verify a mobile phone to confirm your identity.
- Select the Basic support - Free support plan.
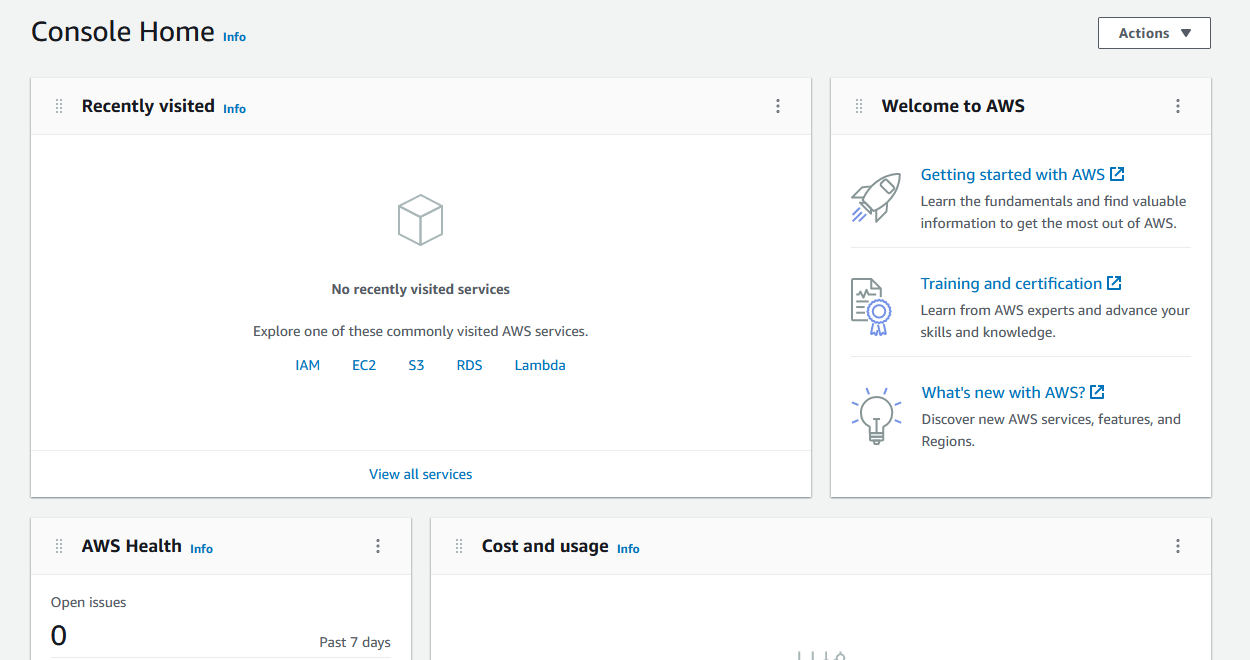
You will now be navigated to your AWS Management Console:
Add MFA for Root user
In order to secure our Root user account, we can enable multi-factor authentication (MFA). By enabling MFA, when we login to our account we will have to type our username and password and also type a one time password from our configured Virtual or Hardware MFA device. So this makes it really hard for someone to compromise our account, as both password knowledge and physical access to our MFA device will be needed.
To make security changes to our account we need to use the Identity and Access Management (IAM) service:
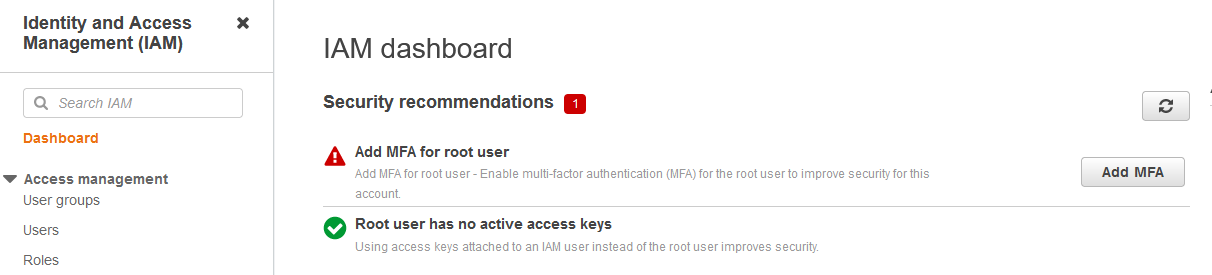
- From the Services button in the navbar, navigate to: Security, Identity & Compliance → IAM Dashboard to access the IAM service.
- Click the Add MFA button.
- Click the Activate MFA button:

- Select your preferred MFA device (most common choice is a Virtual MFA device, which is an Authenticator app on your phone, but you can also use a hardware device if available).
- To add our Virtual MFA device:
- Scan the QR code with your authenticator app (Google Authenticator, Microsoft Authenticator, Twilio Authy or any other).
- Add 2 consecutive codes to complete process.
After completing this process, every time you login to AWS a one time password will be asked to type from your authenticator app.
Add Billing Alarms
It is also important to set some Billing alarms, in order to get notified if we exceed a certain amount per month. Even though we will have a lot of free services for the 1st year, we might use non-free services, or forget to set the alarms after the 1st year has passed. So it is important to set them at an early stage.
To create any type of alarm we need to use the CloudWatch service:
- From the Services button in the navbar, navigate to: Management & Governance → CloudWatch to access the Billing Alarm service.
- From the side menu select the Alarms → Billing section:
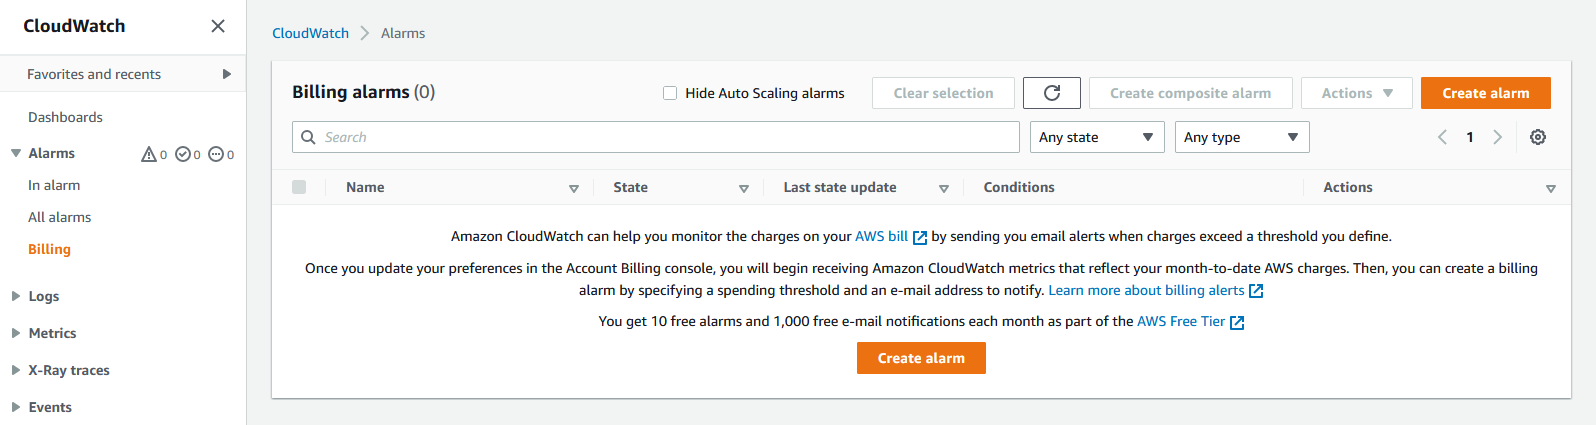
- Click the Create Alarm button.
- On the Metric window, leave the settings to their default.
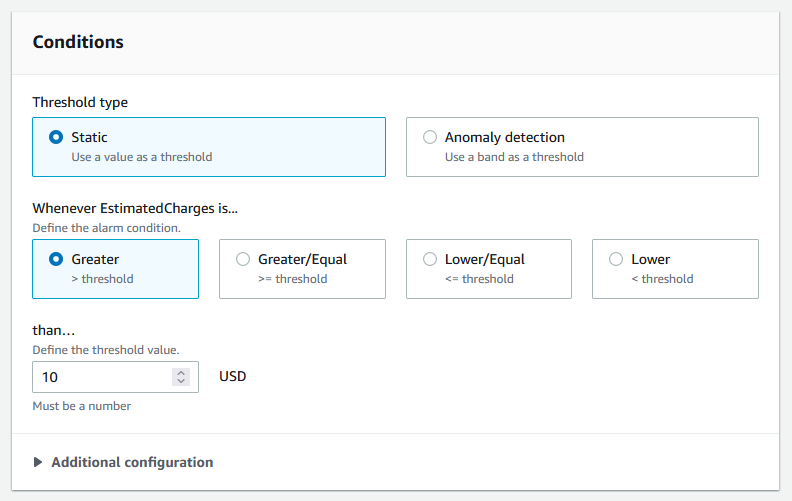
- On the Conditions window, select a Static threshold type, and an alarm notification when
EstimatedChangesis Greater tha 10 USD (or set your desired amount):
- On the Notification window, select the In alarm state trigger, and Create a new topic:
- Add a topic name.
- Add an email to receive the alarms.
- Click the Create Topic button to create it.
- On the Name and description window, add an Alarm name and an Alarm Description
- Click the Create Alarm button to create it.
Now our alarm is created. In the next few minutes, we will receive a confirmation email to the address we entered earlier, that we need to verify, in order to start getting alarms and notifications.
Create a non-Root user
In a Unix system, we have different users with different privileges. We don’t use the root user all the time for anything that we want to do. Similarly, in AWS we can create non-root users with the least privileges to do exactly the needed actions. We will create a non-Root user, that can login to the AWS management console and grand him administrator privileges for simplicity now. Later you can add more granular controls to the users you want to create.
To add and edit users we need to use the Identity and Access Management (IAM) service again:
- From the Services button in the navbar, navigate to: Security, Identity & Compliance → IAM Dashboard to access the IAM service.
- From the side menu select the Access management → Users section:
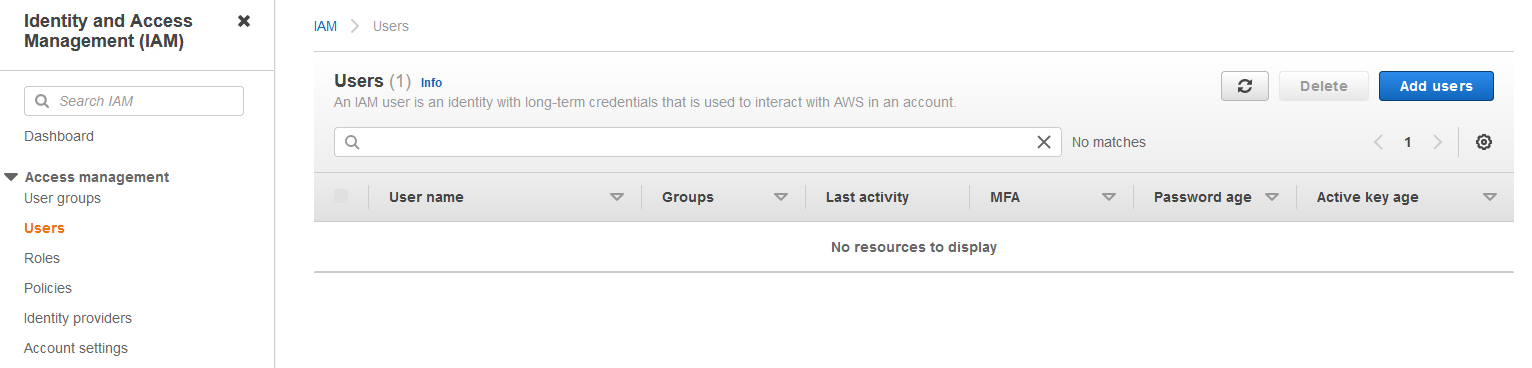
- Click on Add users:
- Select a User name for the new user.
- Select the access type: Add Programmatic or Management console access (the later for full access)
- Select an Autogenerated password, and Require password reset, so the user on their first sign-in they will need to create a new password.
- Click on Next: Permissions:
- We will create a new group to add the user in:
- Add the Group name
- And select the
AdministratorAccesspolicy, that will provide full access to AWS services and resources.
- We will create a new group to add the user in:
- Click on Next: Tags and skip it for now.
- Click Next: Review to review the changes and click the Create User button to finish the process.
Now you can use the new user credentials to login to AWS or use its token for programmatic access. As already said, it is best to create new users with the least amount of privileges for each application you want to deploy in production in order to minimize the security implications.
Next Steps
Next, I will try to document how to configure the aws CLI, how to spin up an EC2 instance and how to create a basic Virtual Private Cloud (VPC). You can also follow the Getting Started page for how to launch an application (containerized or not) in AWS.